Top Outdoor Flooring Ideas For Your Patio
Revamping your patio can transform your outdoor living space into a beautiful, functional area perfect for relaxation and entertainment. Choosing the right outdoor flooring ideas
How to Lay Concrete Pavers?
That’s one of the secret peculiarities of google search trends, not immediately obvious in the data. Those of us researching how to lay paving want to understand what’s involved in the process and if this is something I can achieve to a high standard, a standard that will last and a look I want to live with.
Even a very crude summary of the paving process (or, in industry speak, laying “segmental pavers”) shows a much more involved process than most would care to undertake. The process of Paving, and how to lay would turn off many of those eager google searchers looking into “how to lay pavers.”
The fact remains – Paving contractors exist because “getting the job done right” is much to do with the intricacies of basing and edging correctly. The reality of how to lay paving is a multi-stage process that requires skill and special compacting and cutting equipment completed correctly to progress the job’s successful final finish.
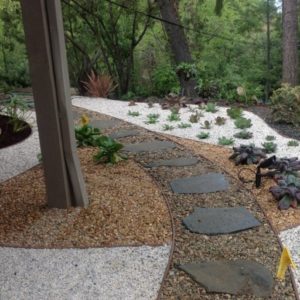
The below project was by a homeowner in greater Adelaide, who did a fantastic job of DIY paving using a bagged stone they sourced locally and mixing with StoneSet polyurethane resin. Again the porous paving natural stone was an idea to shape into flowing curves and bends of the pathways and meeting the corners of existing paved areas and council crossovers, bases of steps and letterboxes.

Another incredible DIY paving result is ideally suited to applying StoneSet resin-bound paving.
One of the best strategies you can use at the start of taking on any project is to pause and assess your assumptions – in this case, do I even need to use pavers?
If you’re pondering how to install pavers in concrete or on that vacant unsightly area around your home – as hundreds of thousands of us have over the past several years – Now is the best time to reassess the options and your approach.
Driveway paving is almost certainly best left to professional contractors. Your car weighs around one tonne, but a skip bin or removal van could be way closer to five tonnes. The failure to prepare a base to industry standard pressure loadings of 32MPA or above can destroy your hard work and theoretical labour savings. The costs to remediate damaged sections or, worse, pull up and dump pavers and re-do the area (this time paying a licensed contractor!)
Areas of foot traffic are different – whether over an existing hard surface or excavating soil and creating a new sound base with a 100mm layer of the compacted, crushed stone base. For those looking at paving patios, and courtyard areas and how to create a pathway – DIY paving gives two very significant advantages to StoneSet over segmental pavers.
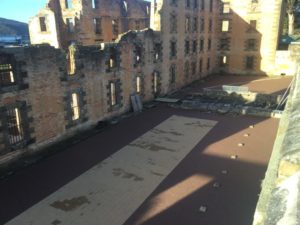
Like for like, StoneSet and pavers have nearly identical properties in durability. Our resin-bound solution uses natural stone and a hard binding resin that has been trusted by architects for decades, in use at Kirribilli house, Port Arthur, Tasmania and thousands of other applications Australia-wide.


The granular nature of stone mixed with resin over a pre-shaped segmental block means StoneSet is vastly easier to shape into existing corners, nooks, narrow strips and all manner of pre-existing edging that is a limitation on almost every job. This huge advantage offsets the time, risk and costs of using concrete saws and other cutting equipments, which is typically the investment into ‘tools of the trade’ paving contractors make to get the job done right.
Your hard work in paving may be quickly undone if you find that water runoff has a serious or knock-on effect at the next downpour, and you need to install drainage. Or similarly, if you receive a knock at your door after Council has become aware of an unapproved hard surface addition to your property – usually after reviewing monthly areal imagery and typically an issue in more densely populated municipalities.
One might wonder why StoneSet resin-bound stone is somewhat of a secret, or as we’re often told, ‘no one knows about it’. Old habits die hard, and pavers, a technology that has been around for centuries, are far more familiar – especially to the predictable forebrain that wants a speedy, easy answer from google search results.
Without being too harsh (the majority of us crave instant answers from google), it is fair to say StoneSet resin-bound stone is the ‘new kid on the block’ – at the very forefront of paving technology.
Whilst pavers have been widespread in the construction industry for centuries, only in the last decade has the polyurethane technology evolved to rival, and exceed the strength of conventional solid clay and cementitious paving alternatives.
Only more recently still, has that technology been developed and packaged as a DIY paving product – meaning it is one of the least widespread and least familiar alternatives available for those wondering how to lay pavers.
"*" indicates required fields
Quick Links

Revamping your patio can transform your outdoor living space into a beautiful, functional area perfect for relaxation and entertainment. Choosing the right outdoor flooring ideas

Building a home in today’s environmentally conscious world goes beyond aesthetics and comfort; it’s also about responsibility. Sustainable house designs minimise the impact on our

Modern home design constantly evolves, with homeowners and architects searching for innovative solutions that blend aesthetics, functionality, and sustainability. As urban spaces become more premium,